UnityでFPS風のカメラを作る方法
こんにちは。
Blenderのキャラクター作成が、なかなかうまくいかず、少しの間中止します。
今回は、Unityで、FPS風のカメラを作る方法を解説します。
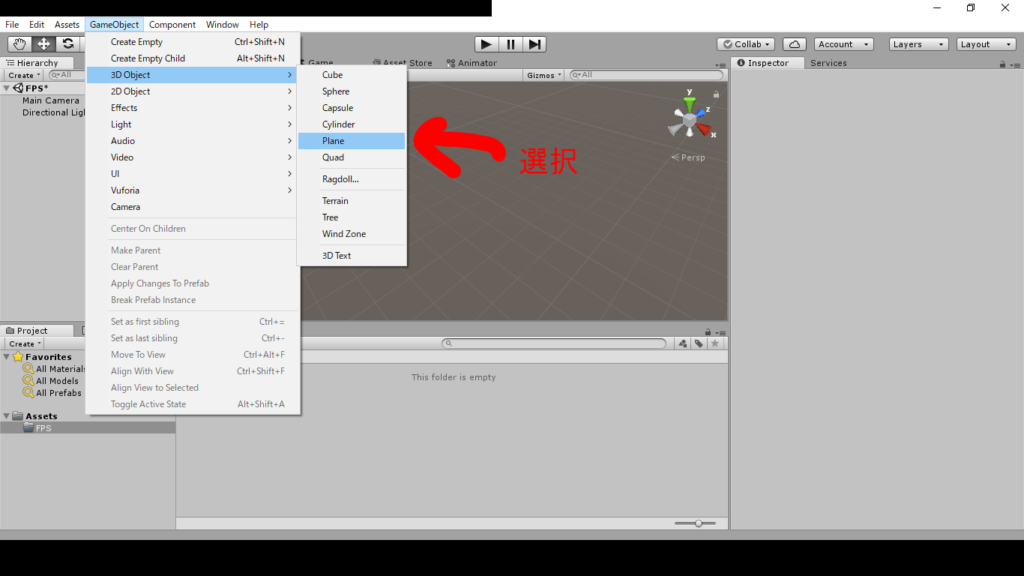
まず床を作ります。
Planeを選択します。
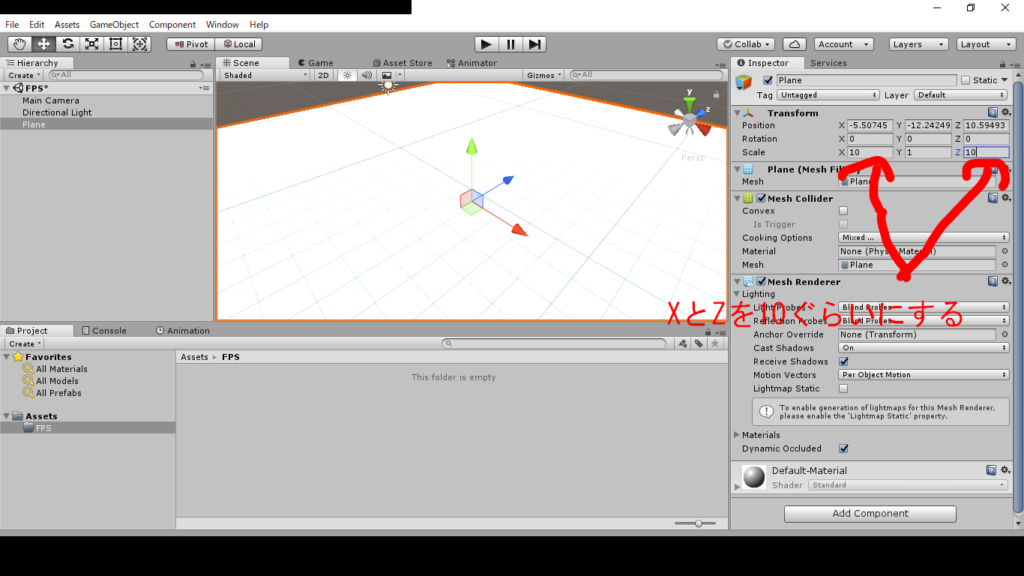
床を大きくします。
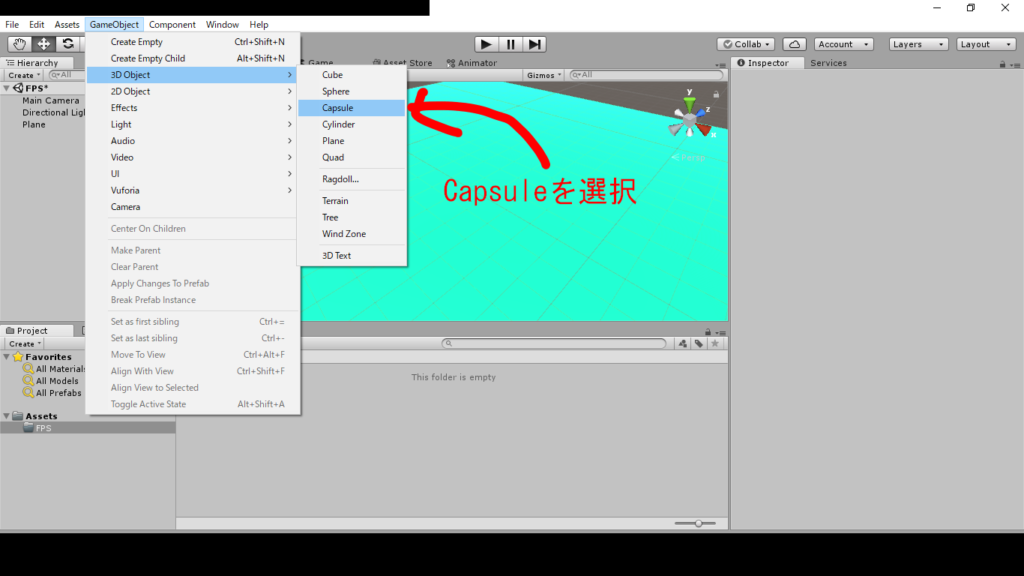
次に、プレイヤーを作ります。
Capsuleを選択します。

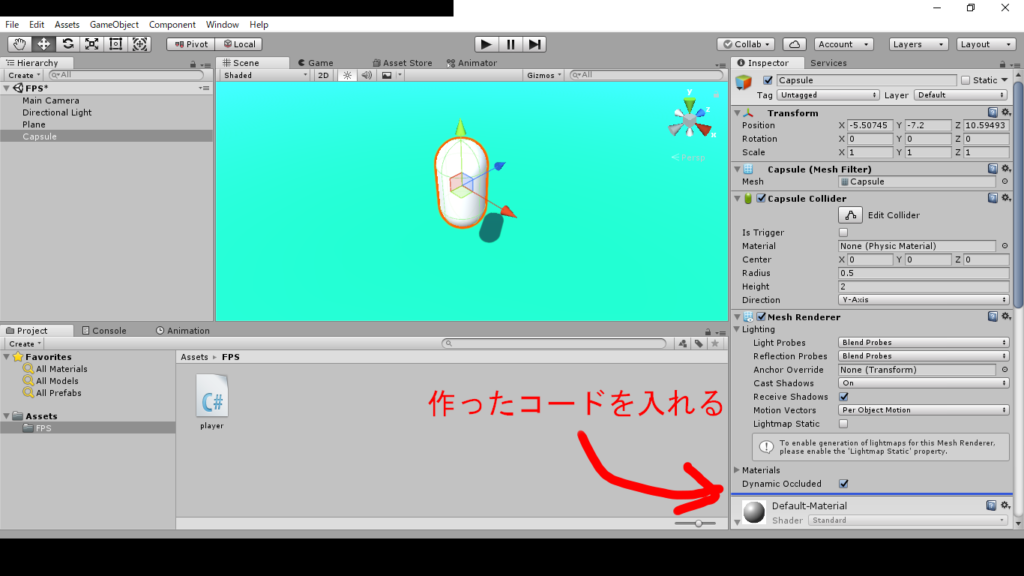
c# Scriptを選択して、スクリプトを書きます。
今回は、このスクリプトをplayerという名前にします。
そのplayerの中にこのコードを入れます。
using System.Collections;
using System.Collections.Generic;
using UnityEngine;
public class player : MonoBehaviour {
	public float walk = 0.05f;
	public float run = 0.1f;
	public Vector2 beforemouse;
	public Vector2 aftermouse;
	// Use this for initialization
	void Start () {
		beforemouse = Input.mousePosition;
		aftermouse = Input.mousePosition;
	}

	// Update is called once per frame
	void FixedUpdate () {
		aftermouse = Input.mousePosition;
		if (beforemouse == aftermouse) {
		} else {
			this.transform.rotation = Quaternion.Euler (0, aftermouse.x - beforemouse.x, 0);
		}
		if (Input.GetKey (KeyCode.W)) {
			if (Input.GetKey (KeyCode.LeftShift)) {
				this.transform.Translate (0f, 0f, run);
			} else {
				this.transform.Translate (0f, 0f, walk);
			}
		}
		if (Input.GetKey (KeyCode.S)) {
			if (Input.GetKey (KeyCode.LeftShift)) {
				this.transform.Translate (0f, 0f, - run);
			} else {
				this.transform.Translate (0f, 0f, - walk);
			}
		}
		if (Input.GetKey (KeyCode.A)) {
			if (Input.GetKey (KeyCode.LeftShift)) {
				this.transform.Translate (- run, 0f, 0f);
			} else {
				this.transform.Translate (- walk, 0f, 0f);
			}
		}
		if (Input.GetKey (KeyCode.D)) {
			if (Input.GetKey (KeyCode.LeftShift)) {
				this.transform.Translate (run, 0f, 0f);
			} else {
				this.transform.Translate (walk, 0f, 0f);
			}
		}
	}
}
public class player : MonoBehaviour {はスクリプトの名前です。
if (Input.GetKey (KeyCode.W)) {からは、移動のコードです。
このコードの仕組みは、フレームごとに、マウスの位置を更新して、マウスの位置によって、主人公オブジェクトを回転させています。
作ったコードを主人公オブジェクトに、ドラッグアンドドロップします。
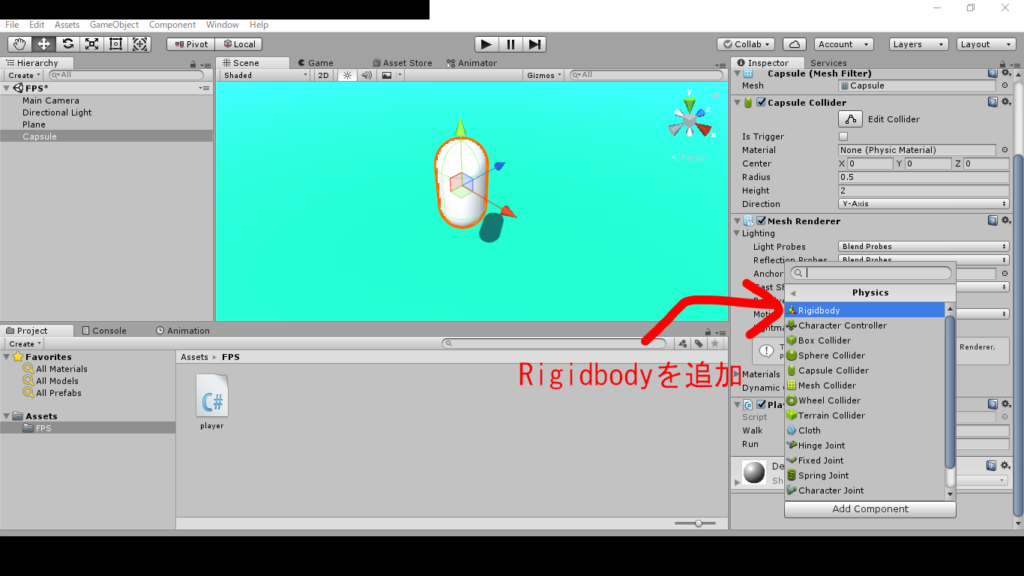
次に、主人公オブジェクトをAdd componentから、Rigidbodyを追加します。
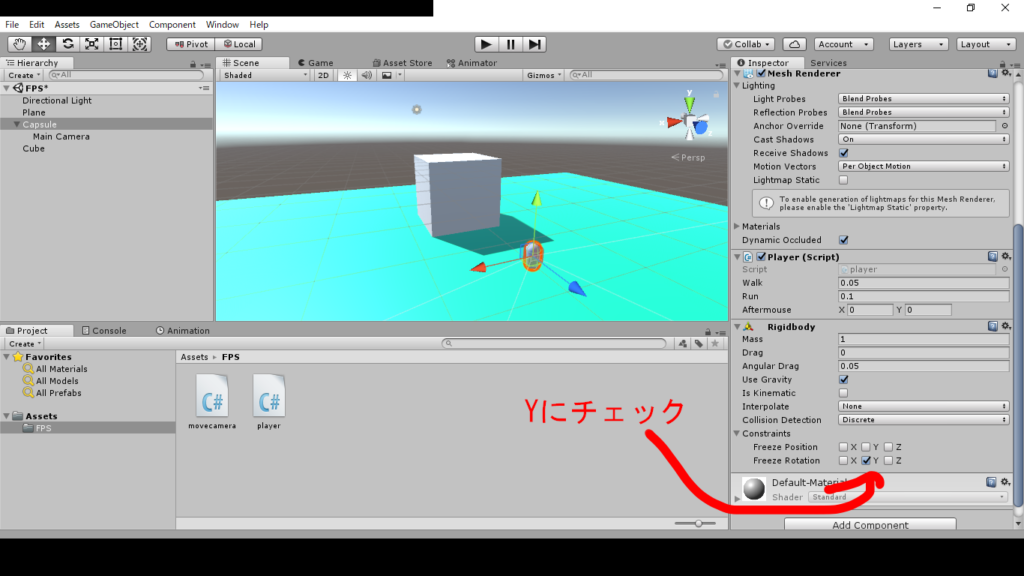
Freese RotationのYにチェックを入れます。
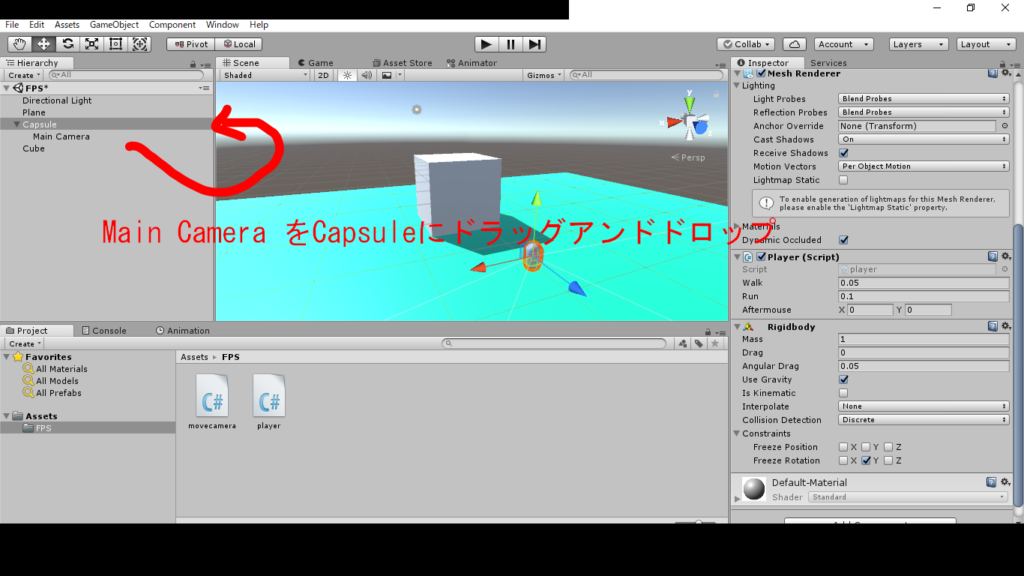
最後に、Main Cameraを主人公オブジェクトに、ドラッグアンドドロップします。
成功したら、実行してマウスを動かすと、カメラも動きます。